Email mikejust3022@gmail.com
Rustic Furniture from the log - Glass Top Tables - Tree Table Sculpture P.O. Box 143, Wilson, Kansas, 67490, US
Copyright 1996 - 2019 - Mike Just - Rustic, natural, organic. Elegant root Furniture - Glass Top stump Tables - Art Furniture - Sculpture All images, rustic furniture design elements and other content represented on this web site are protected under United States and International copyright laws and are the sole property of Michael W. Just, unless otherwise noted. All use and/or publication rights are reserved, worldwide. All represented images and content are not in the Public Domain. No images, or furnishing designs represented on this web site may be copied, stored, manipulated, published, sold or reproduced in whole or in part without the express permission of an authorized representative of Rustic Oak, Mike W. Just, TreeTables.com. Simply Ask.
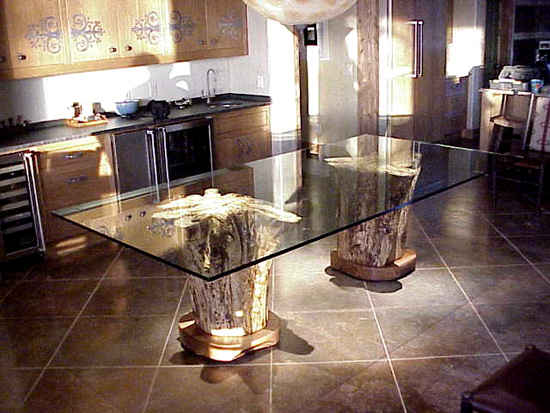
Thick glass tops not only provide a degree of elegance. They are ridged, strong, and VERY flat. With stumps, they are relatively easy to support.
Suggestions for supporting and leveling -
Many would suggest use of the clear plastic discs which are available at glass shops. This is an option and, certainly one I thought of during the initial design stages of stump tables. However, I am rather passionate about "keep it as natural as possible. Perhaps to an extreme. But the the thoughts of using plastic discs was not my first choice.
So, in about the year 2004, here is what was decided: Levelers.
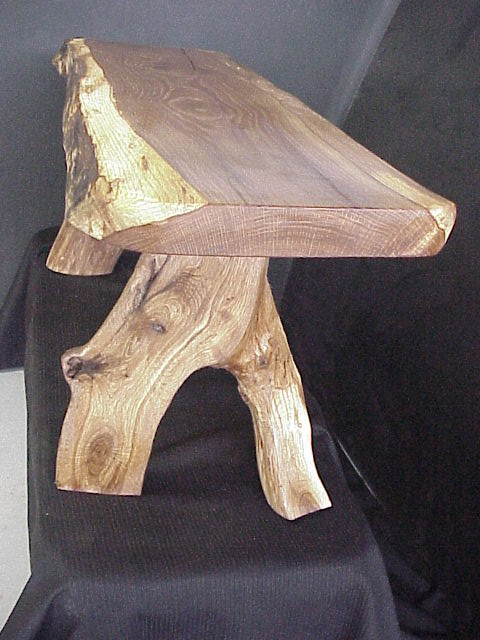
First, we prepare the wooden tops of each stump with three or four distinct "glass resting places". This entails grinding and routing out (lowering) areas of the top, ever so slightly so as to leave slightly elevated areas (the resting places for the glass). We select the location and spread (placement) of these "resting places" so as to support the thick glass tops. On these larger double stump tables, I reccommend a minimum glass thickness of 3/4 of an inch.
Each of the two stumps above had these "resting places". The lower (floor level) support base contains four adjustable levelers. (photo right). These levelers may then be used to bring each stump top up to the glass top such that the "resting places" are supporting the glass and providing stability.
Adjustments up and down is simply a matter of screwing the levelers in or out.
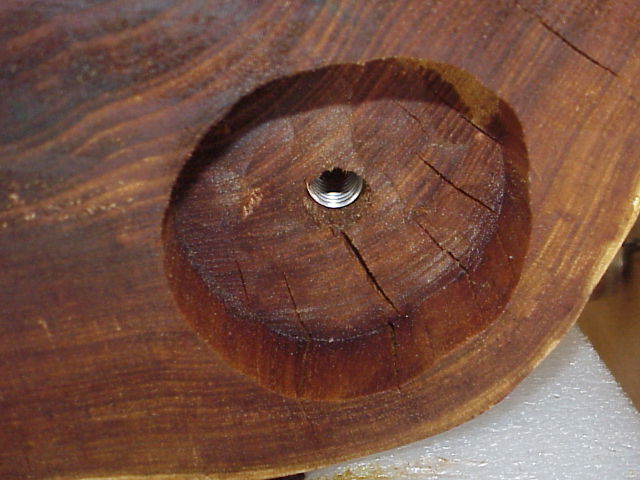
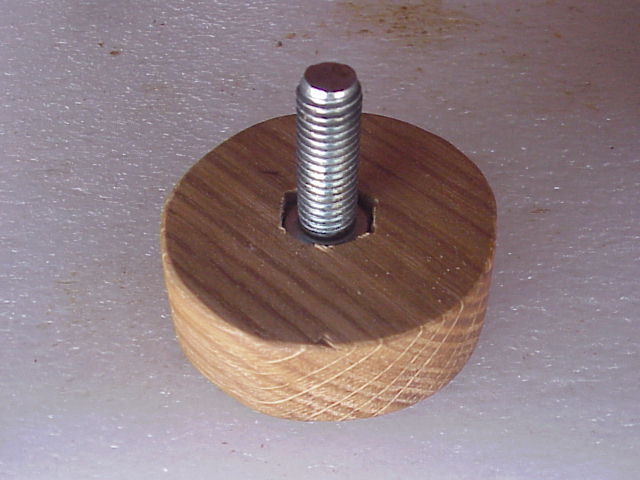
At the time, I was unable to find, commercially, the type of leveler that I wanted. Heavy with 1/2 inch steel threads and a large, 3 inch diameter surface profile. Thus, I made my own levelers of solid oak and high strength bolts.
Underneath the stump, a cutout (cavity) is created for the adjustable lever and a steel threaded insert (to receive the steel bolt) is installed.
The intent of the cavity is, so that you may screw the levelers into it a sufficient distance so as to barely hover the table base off of the floor. Thus, an appearance of "a tree growing out of the floor" may be achieved. Is this too much work in order to achieve a simple natural look? We think not. After all, it is this naturalness that results in a comfortable sense of "peace" within the room.
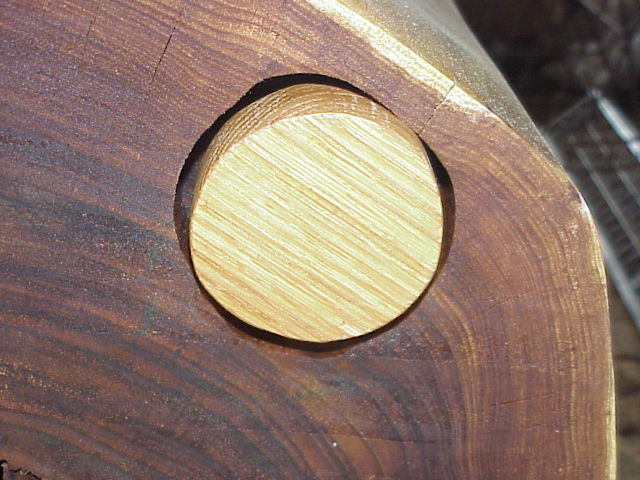
This photo, taken as the stump base lay on it's side, shows the leveler adjusted and down into the cavity. About 3/8 of an inch is projecting.
The question arises; how far do you screw them in? Where do you start? Fact is, every floor is different, but start with the levelers about as this photo (left). It's a start. First get the stumps themselves, stable by adjusting the levelers.
Then, you set the glass on top of the stumps and see where you are at in achieving stability of the glass top. Where the stump lacks touching the bottom of the glass. Raise that section of the stump up and lower the leveler until the glass is touching. Work around each stump until stability is achieved. Go to next stump. Work back and forth between stumps until the entire top is stable. Likely the last time you will ever do this. But, in the event you need to, simply repeat the process.
Not shown on the leveler is the padding. Each leveler will have either felt or cork padding which will contact the floor. Probably not necessary in the case of a harder floors such as stone or concrete.